Related Articles


Nodejs Redis Tutorial
Redis stands for Remote Dictionary Server and it is a popular in-memory data store used in web applications like a database or cache. In this nodejs redis tutorial, you will learn to add, view, search and delete books data into Redis data store using nodejs redis cli module.
Following tasks are performed in this nodejs redis tutorial.
1. Generate a Nodejs application
2. Learn useful redis commands
2. Install nodemon, Redis-CLI modules
3. Create HTML forms to add search, and a table to view records
4. Add nodejs code to add, view, search and delete records

Generate NodeJS application
In order to generate a nodejs application, we need to install nodejs first. Visit the nodejs download page. Download NodeJs and install on your computer.
After nodejs installation, you need to generate nodejs express application skeleton. Let us install Express Generator. Open a command line and go to the directory where you want to create your project.
$ npm install express-generator -g
Express generator installs Express command line tool as well. Express tool can generate nodejs express application skeleton. Open the command line, go to the project directory and type the following command.
express --view=pug nodejs-redis-tutorial
Install required dependencies
After application generation, install required dependencies.
cd nodejs-redis-tutorial && npm install
Install Redis-CLI module
On command line add the following command to install Redis-CLI module.
npm install redis
This command installs Redis command line interface or Redis-cli, you can use Redis-cli to run Redis commands.
Useful Redis Commands
On the command line and type
redis-cli
This will open a command line interface for redis.
Some important commands are as under.
HSET command
This command sets a specified value to a field using a hash that is stored by a key.
redis> HSET newhash field1 "Hello"
(integer) 1
HGET command
This command returns a field value in a hash key.
redis> HGET newhash field1
"Hello"
HMSET command
HMSET command sets multiple field values ina hash stored key
HMSET myhash field1 "Hello" field2 "World"
HMSET command to set a book information
redis> HMSET book001 name "Android App Development" price "$45" author "John Doe"
HGET command
HGET command return field value
HGET myhash field1
HGETAll command
HGETALL command returns all field values for a hash key.
redis> HGETALL myhash
1) "field1"
2) "Hello"
Del command
Del command is used to delete a hash key.
redis> DEL key1 key2 key3
(integer) 2
redis>
Install Nodemon module
Nodemon module automatically restarts the nodejs application if it detects a change in a file.
npm i nodemon
Run application
To run and view application, open command line, and type.
nodemon
View the application in the browser
Open browser and type URL in address bar.
http://localhost:3000
You can view a basic nodejs express application running.
Create nodejs redis tutorial application
Open the project in your favorite editor. Project structure generated by express is as below.

Add code in layout.pug
Open layout.pug file in views directory. Remove existing code and add the code into the file.
doctype html
html
  head
    title= title
    link(rel='stylesheet', href='/stylesheets/style.css')
    link(rel='stylesheet' href='https://bootswatch.com/4/flatly/bootstrap.min.css')
  body
    header
      // Fixed navbar
      nav.navbar.navbar-expand-md.navbar-dark.fixed-top.bg-dark
        a.navbar-brand(href='https://programmerblog.net') Programmer Blog
        button.navbar-toggler(type='button' data-toggle='collapse' data-target='#navbarCollapse' aria-controls='navbarCollapse' aria-expanded='false' aria-label='Toggle navigation')
          span.navbar-toggler-icon
        #navbarCollapse.collapse.navbar-collapse
          ul.navbar-nav.mr-auto
            li.nav-item
              a.nav-link(href='/')
                | Home
    .container
      block content
Bootswatch bootstrap CSS file is included, add a navbar and a container class.
Add code in index.pug file
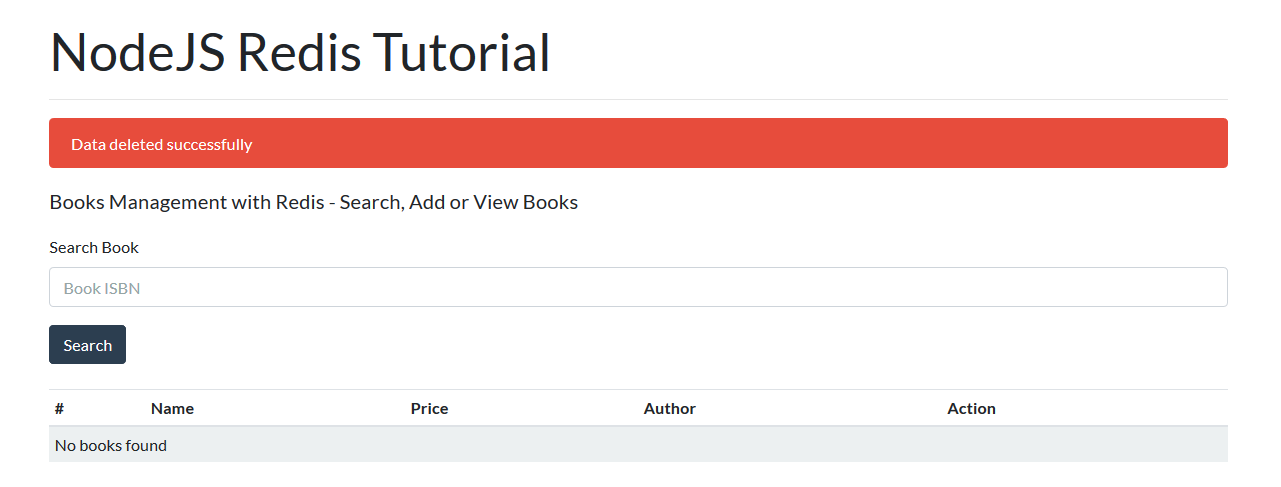
Forms are added to search and add books. An HTML table is added to view book information.
extends layout

block content
    main.container(role='main')
      h1.mt-5 NodeJS Redis Tutorial
      hr
      if error
        .alert.alert-danger
         | #{error}
      if flag ==1
        .alert.alert-success
         | Data added successfully
      else if flag ==2
        .alert.alert-danger
         | Data deleted successfully
      p.lead
       | Books Management with Redis - Search, Add or View Books
      form(action="/book/search" method='GET')
        .form-group
          label Search Book
          input.form-control(type='text' name='isbn' placeholder='Book ISBN' required)
        input.btn.btn-primary(type='submit' value='Search')
      br
      .table-responsive
        table.table.table-striped.table-sm
          thead
            tr
              th #
              th Name
              th Price
              th Author
              th Action
          tbody
            if book
              tr
                td #{isbn}
                td #{book.name}
                td #{book.price}
                td #{book.author}
                td
                  a(href="/book/delete?isbn="+isbn  onclick="return confirm('Are you sure you want to delete this record?');" style="color: #00F") Delete
            else
              tr
                td(colspan="5") No books found

      hr
      form(method='POST' action='/book/add')
        .form-group
          label ISBN
          input.form-control(type='text' name='isbn' placeholder='ISBN of book' required)
          label Name
          input.form-control(type='text' name='name' placeholder='Name of book' required)
        .form-group
          label Price
          input.form-control(type='text' name='price' placeholder='Price' required)
        .form-group
          label Author
          input.form-control(type='text' name='author' placeholder='Author' required)
        input.btn.btn-primary(type='submit' value='Add Book')

Add code to index.js file
Open index.js file in routes directory.
const redis = require('redis');
/* Redis Client */
let redisClient = redis.createClient();

redisClient.on('connect', function(){
  console.log('Redis Connection Successfull');
});
In the code, the redis module is included. A redisClient is created, that is used to perform queries to the redis database. Redis connection is created and a message is logged to console. Replace the code in ‘/’ route.
router.get('/', function(req, res, next) {
  let flag = '';
  flag = req.query.flag
  res.render('index', { title: 'NodeJS Redis Tutorial', flag: flag });
});
A flag variable from URL is assigned to index.pug. The flag is used to display a message to a user when a book is added or deleted.
Add book route to nodejs redis tutorial
When a user adds data to form and clicks Add Book, data is added to the Redis data store.

In index.js, add book/add route.
router.post('/book/add', function(req, res, next) {
    let isbn = req.body.isbn;
    let name = req.body.name;
    let price = req.body.price;
    let author = req.body.author;

    redisClient.hmset(isbn, [
      'name', name,
      'price', price,
      'author', author
    ], function(err, result){
      if(err){
        console.log(err);
      }
      console.log(result);
      res.redirect('/?flag=1');
  });
  // res.render('index', { title: 'NodeJs Redis Tutorial' });
});
In the above code snippet gets ISBN, name, price and author values and assigns it to variables. Using RedisClient’s hmset method uses ISBN as a hash key to save a book record into redis cache. The user is redirected back to ‘/’ with a flag to display a success message to the user.

Add search route for nodejs redis tutorial
In order to search a book from Redis, search route is added to the index.js file.

/* Search book. */
router.get('/book/search', function(req, res, next) {
  let isbn = req.query.isbn;
  redisClient.HGETALL(isbn, function(err, objBook){
    if(!objBook){
      console.log(err);
      res.render('index', {error: 'No record found'});
    }else{
      res.render('index', {isbn: isbn, book: objBook});
    }
  });
});
In the code, an ISBN value is passed to redisClient ‘s HGETALL method as a hash. In callback method, an error and a book object are returned. If there is no book object, an error is displayed. if there is a book object returned, it is assigned to index.pug.
Delete a book from redis
To delete a book, a user click on delete link, a confirmation message is shown to the user.

/* Search book. */
router.get('/book/delete', function(req, res, next) {
  let isbn = req.query.isbn;
  redisClient.del(isbn, function(err, response) {
    if (response) {
       console.log("Deleted Successfully!");
       res.redirect('/?flag=2');
    } else{
     console.log("Cannot delete"+ error);
    }
 })
});
ISBN is used as a hash and passed to redisClient’s Del command. Data is deleted from the redis data store and the user is redirected to ‘/’ with a flag and a message is displayed to the user.
Download source code
The source code for this tutorial can be downloaded for the GitHub repository.
Summary
In this nodejs redis tutorial, you have learned to generate a nodejs express application, installed the redis-cli module. Created HTML forms and a table to add, search, view and delete book information using the redis-cli module.
To stay updated about upcoming articles, like us on Facebook, follow us on Twitter or subscribe to our newsletter.
Related Articles
- NodeJs MongoDB Tutorial
- NodeJs user registration tutorial
- PHP MongoDB tutorial
- Nodejs weather app
- PHP MySQL drag drop to do list
Previous Article
Next Article
