Codeigniter file upload example
Codeigniter is a light weight MVC based PHP framework. It is very popular in web development community. Codeigniter is widely used to perform different types of tasks. File upload in codeigniter is very easy and in this article we will see codeigniter file upload example.

Codeigniter can be downloaded from https://www.codeigniter.com/download. After downloading unzip the codeigniter folder, it will be unzipped inside folder name like CodeIgniter-3.x.x. Rename it to a project name you want to use. We will rename this to uploadexample. copy this folder and paste it in to root folder of XAMPP , WAMP or MAMP or what ever software your are using. In XAMPP root folder is htdocs. We are going to see codeigniter file upload example.
Codeigniter folder structure

As you can see the CI main folder structure. There are system, application and user_guide folders and index.php file. System folder contains the core CI files while application folder contains the code for application.
Important folders in application directory
CI is based on Model-View-Controller or MVC design pattern. As you can see in the picture below that inside application folder we have many folders further but most important ones are config, controller, model, views .

2. Create success.php file inside Views.
3. Create Upload.php inside Controller folder.
4. Create a folder Uploads in project folder.
4. Upload an image file, validate it and save it to a directory on server.
Create uploads directory
First go to project folder (Example: uploadexample ) and create a folder named Uploads, in this folder, files or images are going to be uploaded.
Create a form to upload file.
Open Views folder and then create a file named upload.php and add following code.
<!DOCTYPE html>

<html>

<head>

<title>Codeigniter Upload Example</title>

</head>

<body>

<?php echo $error; ?>

<h3>Upload Example</h3>

<?php echo form_open_multipart('upload/upload_file'); ?>

<input type="file" name="userfile" size="20" />

<br /><br />

<input type="submit" value="upload" />

</form>

</body>

</html>
The above code create a small form with Upload file input and an upload button. After <body> tag errors are displayed. Then we use the line below to create a form in codeigniter.
<?php echo form_open_multipart('upload/upload_file'); ?>
form_open_multipart(‘upload/upload_file’) is codeigniter function, it is same is form_open. form_open_multipart add an extra attribute enctype=”multipart/form-data”. This attribute is required when you need to upload a file or image. The above code generates HTML like:
<form action="http://localhost/uploadexample/index.php/upload/upload_file"

 enctype="multipart/form-data" method="post" accept-charset="utf-8">
After opening the form we create a file input field, then a submit button and close the form tag. The code above creates a form as shown below in the image.

Add success file code
We will display message after file is uploaded successfully. So add a file named success.php in Views directory and add following code.
<html>
<head>
<title>Codeigniter File Upload Success</title>
</head>
<body>
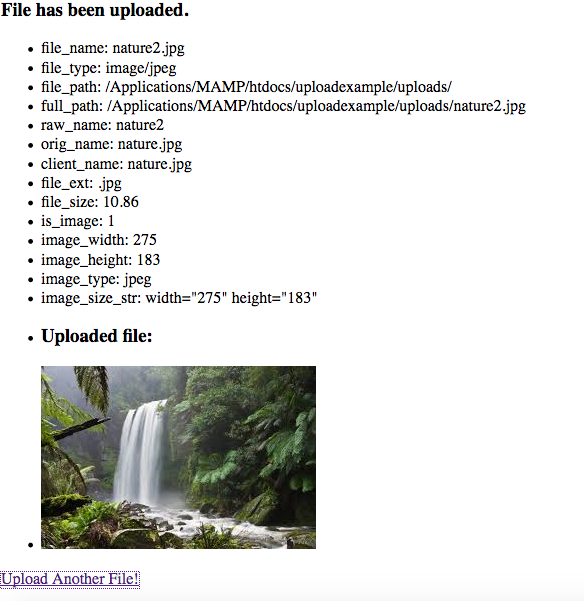
<h3>File has been uploaded.</h3>
<ul>
<?php foreach ($upload_data as $item => $value): ?>
<li><?php echo $item;?>: <?php echo $value;?></li>
<?php endforeach; ?>
<li><?php echo "<h3>Uploaded file:</h3>"; ?></li>
<li>
<img src="<?php echo base_url().'/uploads/'.$upload_data['file_name']; ?>" /></li>
</ul>
<p><?php echo anchor('upload', 'Upload Another File!'); ?></p>
</body>
</html>
In the code above all the data of uploaded file is inside $upload_data variable. we run loop foreach ($upload_data as $item=>$value) and $item displays file information like File name, File type, File path, Size and Extension etc. While $value displays values of the parameters above. After end of loop uploaded image is displayed in img tag.
Changing default route in routes.php
In Applications folder, open routes.php in config folder and change
$route['default_controller']
to
$route['default_controller'] = 'upload';
So this will change default controller to upload and http://localhost/uplaodexample/ URL will display upload form.
Codeigniter Controller code to upload file to server.
Now let add controller class. In Controller directory add Upload.php file and add following code.
<?php
  defined('BASEPATH') OR exit('No direct script access allowed');

  class Upload extends CI_Controller {

        public function __construct()
        {
            parent::__construct();
            $this->load->helper(array('form', 'url'));
            $this->load->library('form_validation');
        }

        public function index()
        {
        	$this->load->view('upload', array('error' => ' ' ));
        }

        public function upload_file()
        {
                $config['upload_path']          = './uploads/';
                $config['allowed_types']        = 'gif|jpg|png|pdf|doc';
                $config['max_size']             = 100;
                $config['max_width']            = 1024;
                $config['max_height']           = 768;

                $this->load->library('upload', $config);

                if ( ! $this->upload->do_upload('userfile'))
                {

                    $this->form_validation->set_error_delimiters('<p class="error">', '</p>');

                    $error = array('error' => $this->upload->display_errors());

                    $this->load->view('upload', $error);
                }
                else
                {
                    $data = array('upload_data' => $this->upload->data());

                    $this->load->view('success', $data);
                }
        }
}
Controller explanation
As you can see we added a class named Upload and this class is a child of CI_Controller. Then Inside class we declared constructor __construct and call parent class constructor. And then we load codeigniter helpers form and url . Form helper contains functions that assist in working with forms and URL helper contains functions that assist in working with URLs.
Index Action explanation.
Next we are going to define Index Action that displays Upload.php in Views folder.
upload_file Action explanation
The upload_file action will upload file to server.
                $config['upload_path']          = './uploads/';
                $config['allowed_types']        = 'gif|jpg|png';
                $config['max_size']             = 100;
                $config['max_width']            = 1024;
                $config['max_height']           = 768;

                $this->load->library('upload', $config);
In the code snippet above basic configuration for upload is set e.g upload_path, allowed_types, max size, max width and max height. Then we load Codeigniter’s Upload Library and pass the config parameter array to it. This library contains all the function that are used to validate and upload a file to server.
                if ( ! $this->upload->do_upload('userfile'))
                {


                    $error = array('error' => $this->upload->display_errors());

                    $this->load->view('upload', $error);
                }
                else
                {
                    $data = array('upload_data' => $this->upload->data());

                    $this->load->view('success', $data);
                }
In code above the field userfile contains the uploaded file. In if condition we check that if file is not uploaded then $error contains any errors occurred. $this->upload->do_upload(‘userfile’) function uploads file to server. We load the Upload view again and assign $error to it. In view we display errors to user. In case of success we save uploaded file to the destination folder.
$this->upload->data()
Above function will save uploaded file data to upload_data array element from upload->data array. and finally success view is loaded showing success message and uploaded file information.
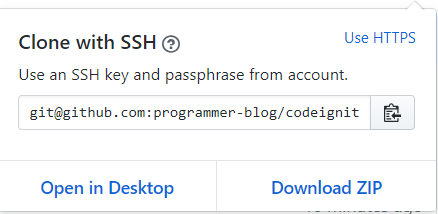
In conclusion, we have CodeIgniter file upload example. You can clone or download source code of this tutorial from GitHub repository.
Please leave your comment feedback below. Stay tuned for upcoming articles
Related Articles:
-
How to Zip, Save and Download a file in CodeIgniter
-
How to watermark images using CodeIgniter
-
Create Restful web services in CodeIgniter
-
SOAP web services in php
-
PHP Mongodb tutorial
Next: How to Zip, Save, and Download a file in CodeIgniter
Previous: Parse XML Using PHP