A Beginner’s Guide to Apriori Algorithm in Python
Association Rule Mining is a data mining technique used to discover interesting relationships between items in large datasets. In this beginner’s guide, we’ll delve into Association Rule Mining using the Apriori algorithm in Python. We’ll provide detailed explanations and code examples, making it accessible to beginners.

Before we begin, you’ll need:
- A basic understanding of Python programming.
- A Python environment with the required libraries installed. If you haven’t installed them already, follow these steps:
Python and Library Installation Steps
- Python Installation: If you don’t have Python installed, download and install it from the official Python website.
- Library Installation: Open your command prompt or terminal and use the following commands to install the necessary libraries:
pip install pandas
pip install numpy
pip install mlxtend
pip install matplotlib
pip install seaborn
Section 1: Setting Up the Environment
To begin, let’s import the essential Python libraries and modules for data analysis and visualization. These libraries are crucial for our analysis.
# Import libraries
import pandas as pd
from mlxtend.frequent_patterns import apriori
from mlxtend.frequent_patterns import association_rules
import matplotlib.pyplot as plt
import seaborn as sns
from mlxtend.preprocessing import TransactionEncoder
- In this section, we import the necessary libraries to set up our Python environment for Association Rule Mining. Here’s what each library is used for:
pandasis used for data manipulation and handling DataFrames.mlxtend.frequent_patternsprovides functions for the Apriori algorithm and frequent pattern mining.matplotlib.pyplotandseabornare used for data visualization.mlxtend.preprocessingcontains theTransactionEncoderfor one-hot encoding.
Section 2: Understanding the Dataset
In this tutorial, we’ll work with a sample dataset simulating shopping cart data. Each row in the dataset represents items bought in a single transaction. Let’s load and explore this dataset.
data = [['milk', 'bread', 'nuts'],
        ['milk', 'bread', 'diapers', 'beer'],
        ['milk', 'nuts', 'diapers'],
        ['bread', 'nuts', 'beer'],
        ['milk', 'bread', 'nuts']]
In this section, we define a sample dataset data. Each inner list represents a transaction, and the items in the transaction are specified as strings.
# Convert data to a DataFrame
te = TransactionEncoder()
te_ary = te.fit(data).transform(data)
df = pd.DataFrame(te_ary, columns=te.columns_)
- These lines convert the transaction data into a one-hot encoded format using the
TransactionEncoderfrom themlxtend.preprocessingmodule. This format is suitable for Apriori analysis. We create a DataFramedfwith binary values where each column corresponds to an item.
Section 3: Data Preprocessing
To prepare the data for Apriori analysis, we’ll perform data preprocessing steps, including one-hot encoding the items to convert them into a suitable format for the Apriori algorithm.
# One-hot encode the data
df_encoded = df.astype(int)
- In this section, we perform one-hot encoding on the DataFrame
dfby converting the data to integer values. This step prepares the data for the Apriori algorithm.
Section 4: Basics of Apriori algorithm in Python
Now, let’s understand the fundamental concepts of the Apriori algorithm, such as support, confidence, and lift. These metrics are crucial for identifying significant associations between items.
# Find frequent itemsets
frequent_itemsets = apriori(df_encoded, min_support=0.5, use_colnames=True)
- In this section, we use the
apriorifunction frommlxtend.frequent_patternsto find frequent itemsets in the one-hot encoded DataFrame. Themin_supportparameter specifies the minimum support threshold, anduse_colnames=Trueensures that item names are used as column names.
Section 5: Implementing Apriori algorithm in Python
We’ve successfully implemented the Apriori algorithm in Python to find frequent itemsets and generate association rules. These rules reveal interesting patterns and associations in the data.
Section 6: Analyzing Results
Let’s dive into analyzing and visualizing the results. We’ll create visualizations to understand frequent itemsets’ support and association rules’ confidence and lift. Filtering rules by specific criteria can help identify the most meaningful associations.
# Visualize frequent itemsets
plt.figure(figsize=(8, 4))
sns.barplot(x='support', y='itemsets', data=frequent_itemsets)
plt.xlabel('Support')
plt.ylabel('Itemsets')
plt.title('Frequent Itemsets')
plt.show()
In this section, we create a bar plot to visualize the frequent itemsets and their support values using matplotlib.pyplot and seaborn. This helps in understanding which itemsets are most frequent.
# Visualize association rules
plt.figure(figsize=(8, 4))
sns.scatterplot(x='support', y='confidence', size='lift', data=rules)
plt.xlabel('Support')
plt.ylabel('Confidence')
plt.title('Association Rules')
plt.show()
Similar to the previous visualization, these lines create a scatter plot to visualize association rules based on support, confidence, and lift values. This provides insights into the strength of the rules.
# Filter rules by confidence and lift
filtered_rules = rules[(rules['confidence'] >= 0.7) & (rules['lift'] > 1.2)]
- We print the filtered association rules to the console to examine the rules that meet our criteria.
Running the code in Google Colab
To run Python data mining code in Google Colab, you can follow these instructions:
- Access Google Colab:
- Open a web browser and go to the Google Colab website (https://colab.research.google.com/).
- Sign In with Google Account:
- Sign in with your Google account if you are not already logged in.
- Create a New Notebook:
- Click on “New Notebook” to create a new Colab notebook.
- Upload the Python Code File:
- If your data mining code is saved in a Python (.py) file, you’ll need to upload it to Colab. You can do this in the following way:
- Click on the “File” menu in Colab.
- Select “Upload…”
- Choose the Python code file from your local machine and upload it.
- If your data mining code is saved in a Python (.py) file, you’ll need to upload it to Colab. You can do this in the following way:
- Run Code Cells:
- Colab uses cells for code execution. By default, you have an empty code cell to start with. You can add code cells as needed.
- Copy and paste your data mining code into a code cell or write your code directly in a cell.
- Execute Code:
- To execute a code cell, you can either press Shift+Enter or click the “Play” button (triangle icon) next to the cell.
- Install Dependencies:
- If your data mining code relies on external libraries or packages that are not already available in Colab, you may need to install them using pip. You can run pip commands directly in a code cell, for example:
diff
- If your data mining code relies on external libraries or packages that are not already available in Colab, you may need to install them using pip. You can run pip commands directly in a code cell, for example:
-
-
!pip install package_name
-
- Upload Data Files:
- If your data mining code requires input data files, you can upload them to Colab by clicking the “Files” tab in the left sidebar and then clicking the “Upload” button.
- Save and Share Your Work:
- Colab automatically saves your work in Google Drive. You can also download the notebook and share it with others if needed.
- GPU and TPU Acceleration:
- If your data mining tasks require significant computational power, you can leverage Google Colab’s GPU or TPU resources. Go to “Runtime” > “Change runtime type” and select a GPU or TPU from the hardware accelerator dropdown.
- Documentation and Help:
- If you encounter any issues or need assistance with specific Python libraries or functions, you can access the Colab documentation and forums for help.
That’s it! You should now be able to run your Python data mining code in Google Colab. It provides a convenient and cloud-based environment for running Python code, especially for data analysis and machine learning tasks.
Source code of the tutorial
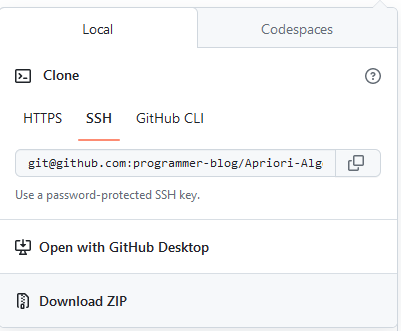
You can find source code of the tutorial at our Github repository.
Conclusion
In this tutorial, we’ve explored the Apriori algorithm, a fundamental technique in Association Rule Mining. We’ve covered everything from setting up the Python environment, understanding the dataset, preprocessing data, implementing Apriori, and analyzing the results visually. By filtering the rules, we can extract valuable insights from our data.
Association Rule Mining has applications in various fields, including market basket analysis, recommendation systems, and more. As you continue your data mining journey, you can apply these principles to discover hidden patterns and associations in your own datasets.
Learning Resources:
- Data Science A-Z™: Real-Life Data Science Exercises Included
Description: Learn to create Machine Learning Algorithms in Python and R from two Data Science experts. Code templates included. - Deep Learning A-Z™ 2023: Neural Networks, AI & ChatGPT Bonus
Description: Learn to create Deep Learning Algorithms in Python from two Machine Learning & Data Science experts. Templates included.
These courses cover a wide range of topics in data science and machine learning and are highly rated by learners. You can explore them to enhance your skills in these domains.
Final Thoughts
Association Rule Mining with Apriori is a powerful tool for uncovering valuable insights from transactional data. By understanding the support, confidence, and lift metrics, you can identify meaningful associations that can drive decision-making and business strategies.
Now that you’ve completed this tutorial, you have a solid foundation to explore and apply Association Rule Mining to real-world datasets. Experiment with different datasets and parameter settings to gain a deeper understanding of this technique and its potential.
Related Articles:
- How to become an AI and ML developer
- What is Virtual Reality and what are VR Applications?
- What is Human Computer Interaction? and what are HCI applications
- What is Agile Software Development? And The Best Agile Practices
Previous Article
Next Article
 Best Tech Blog For Programming Articles And Video Tutorials Code Is Easy

