NodeJS send email tutorial
Sending emails to users is an important feature in modern web applications. In a previous tutorial we explored how to create a dynamic photo gallery using PHP. This tutorial explores nodeJS send email using NodeMailer. Suppose you are working on a NodeJS MySQL web application that needs to send emails to subscribers.

Following tasks are performed in this tutorial.
1. Installation of MySQL and phpMyAdmin
2. Create MySQL database and a table for subscribers and insert sample data
3. Install NodeJS and generate a NodeJS, Express application
4. Create a model for subscribers
5. Display subscribers using Node ORM
7. Create a popup form to enter the subject and email body fields.
8. Send an email using nodemailer module and Ethereal, a fake SMTP service
Install MySQL and phpMyAdmin
To install MySQL with phpMyAdmin, visit WAMP or XAMPP site, download and install. After installation run WAMP or XAMPP and open phpMyAdmin by typing URL http://localhost/phpmyadmin
Create a Mysql database and table for subscribers
In phpMyAdmin, Open SQL tab and run the queries below to create a database dbsubscribers and a table subscribers. Sample data is also inserted into subscribers table.
CREATE DATABASE IF NOT EXISTS `dbsubscribers` DEFAULT CHARACTER SET latin1 COLLATE latin1_swedish_ci;

USE `dbsubscribers`;

-- --------------------------------------------------------

--
-- Table structure for table `subscribers`
--

CREATE TABLE `subscribers` (
  `id` int(11) NOT NULL,

  `first_name` varchar(200) NOT NULL,

  `last_name` varchar(200) DEFAULT NULL,

  `email` varchar(200) NOT NULL

) ENGINE=InnoDB DEFAULT CHARSET=latin1;

--
-- Dumping data for table `subscribers`
--

INSERT INTO `subscribers` (`id`, `first_name`, `last_name`, `email`) VALUES
(1, 'John', 'Doe', 'john.doe@example.com'),
(2, 'Jane', 'Doe', 'jane.doe@example.com'),
(3, 'Mark', 'W', 'mark1212@example.com'),
(4, 'Jason', 'F', 'jason@example.com');

--
-- Indexes for dumped tables
--

--
-- Indexes for table `subscribers`
--
ALTER TABLE `subscribers`
  ADD PRIMARY KEY (`id`);

--
-- AUTO_INCREMENT for dumped tables
--

--
-- AUTO_INCREMENT for table `subscribers`
--
ALTER TABLE `subscribers`
  MODIFY `id` int(11) NOT NULL AUTO_INCREMENT, AUTO_INCREMENT=5;
COMMIT;

Install NodeJS, Express Generator and Express
To install NodeJS, visit NodeJS site, download and install. NodeJS also installs NPM. NPM is used as a package manager for NodeJS modules. After installation, open the command line and go to the folder where you want to create your project. To create a NodeJS project, first, you need to install express generator. Type command below to install Express Generator.
npm install express-generator -g
Create a NodeJS project using Express in nodejs send email
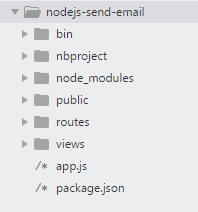
Express generator package installs the Express command line tool to create an express, nodejs application. Type the command below to create a project nodejs-send-email. PUG is used as a template engine.
express --view=pug nodejs-send-email

Install modules and run the project
Next, change directory to the project folder and installs all required packages and modules.
cd nodejs-send-email && npm install
To run and view the app
SET DEBUG=nodejs-send-email:* & npm start
To view the running application, open browser and type the URL below. You can see the running application.
http://localhost:3000
Install ORM and NodeMailer modules.
To access database and perform queries you need to install an ORM module. Node-ORM module is used to perform relational mapping to database objects. Open command line, go to the project folder.
npm install orm
To send email, NodeMailer module is used. Install nodemailer using NPM.
npm install nodemailer --save
Create a Model for subscribers in index.js file
Open project folder in your favorite IDE. Open index.js file in routes directory. Add statement below to include node orm.
var orm = require('orm');
The application needs to connect to the database and define a model for subscribers table.
router.use(orm.express("mysql://root:@localhost:/dbsubscribers", {


  define: function (db, models, next) {


    models.subscribers = db.define("subscribers", {


    id         : Number,


    first_name : String,


    last_name  : String,


    email      : String,


  });

  next();

  }

}));
Inside router.use, a method orm.express is defined. In this method, MySQL driver is specified with root as user. Note ( : ) after username, you can specify a password after : . Localhost is used as a server and specify dbsubscriber as database. A model for subscribers table is defined.
Id, first_name, last_name and email fields are defined with data types. Id as a number, first_name, last_name and email has a string type.
Display subscribers using Node ORM
Inside router.get(‘/’) route, remove existing code with the code given below. First, you see req.models.subscribers’s find method used without a condition using { }. All the records from the database are fetched.
In an anonymous method, error and subscribers result set is returned. An error is thrown in case of error. Otherwise, render method is called. index template file is rendered. Title and Subscribers are assigned to view the file.
 router.get('/', function(req, res, next) {


   var result = req.models.subscribers.find({


   }, function(error, subscribers){


            if(error) throw error;


            res.render('index', { subscribers:subscribers, title: 'NodeJS Send Email Tutorial' });


        });

})

Update code in layout.pug file
To display all subscribers, update code inside layout.pug and index.pug files in views directory. Open layout.pug file in views folder.
doctype html

html(lang="en")

  head

   title NodeJS Send Email

   meta(charset="utf-8")

   meta(name="viewport", content="width=device-width, initial-scale=1")

   link(rel="stylesheet", href="//maxcdn.bootstrapcdn.com/bootstrap/3.3.7/css/bootstrap.min.css")

   script(src="//ajax.googleapis.com/ajax/libs/jquery/3.2.1/jquery.min.js")

   script(src="//maxcdn.bootstrapcdn.com/bootstrap/3.3.7/js/bootstrap.min.js")

  body

   block content
In the code above bootstrap CSS, jQuery and bootstrap js files are included. After body tag note down the block content, all content from view files displays under this block.
Add code to index.pug file
Open index.pug file inside views folder and replace code. In HTML table First, Last name and Email are displayed. The last column is Action. In Action column, Send Email link is displayed. In each link, a data-toggle attribute is added with value model.
Data target contains the id of the popup div. A class js-sendemail is also added to each link, this class is used to open popup form. A data attribute, data-email is assigned the value of each user’s email.
extends layout
block content
  .container
    h2 NodeJS Send Email
    p Click Send Email to Open a Popup form, Fill in the form and click Send Email.
    br
    table.table.table-striped
      thead
       tr
         th First Name
         th Last Name
         th Email
         th Action
      tbody
       each subscriber in subscribers
        tr
          td #{subscriber['first_name']}
          td #{subscriber['last_name']}
          td #{subscriber['email']}
          td
            a(href="javascript:void(0)" data-toggle="modal" data-target="#emailModal" class='js-sendemail' data-email=subscriber['email']) Send Email
Create a popup to display form to send email
In order to use nodejs send email feature, a bootstrap popup form is created and user needs to fill in a form with subject and body fields. Id of model popup div is #emailModel with role = dialog.
When Send Email link is clicked popup form is opened. A hidden input field is added to store email of the user. Email with subject and body fields is sent to the server. Buttons to send the email and close the form are also added.
#emailModal.modal.fade(role="dialog")
      .modal-dialog
        .modal-content
          .modal-header
            button.close(type="button", data-dismiss="modal") ×
            h4.modal-title NodeJS Send Email
          .modal-body
            div#msgdiv.alert.alert-danger(style="display:none")

            form(method="post")
              input#email.form-control(type="hidden")
              .form-group
                label(for="email") Subject:
                input#subject.form-control(type="text", placeholder="Enter subject", name="subject")
              .form-group
                label(for="pwd") Body:
                textarea#body.form-control(rows="5" placeholder="Email body")

              button#btnemail.btn.btn-default(type="button" ) Send Email
          .modal-footer
             button.btn.btn-default(type="button", data-dismiss="modal") Close

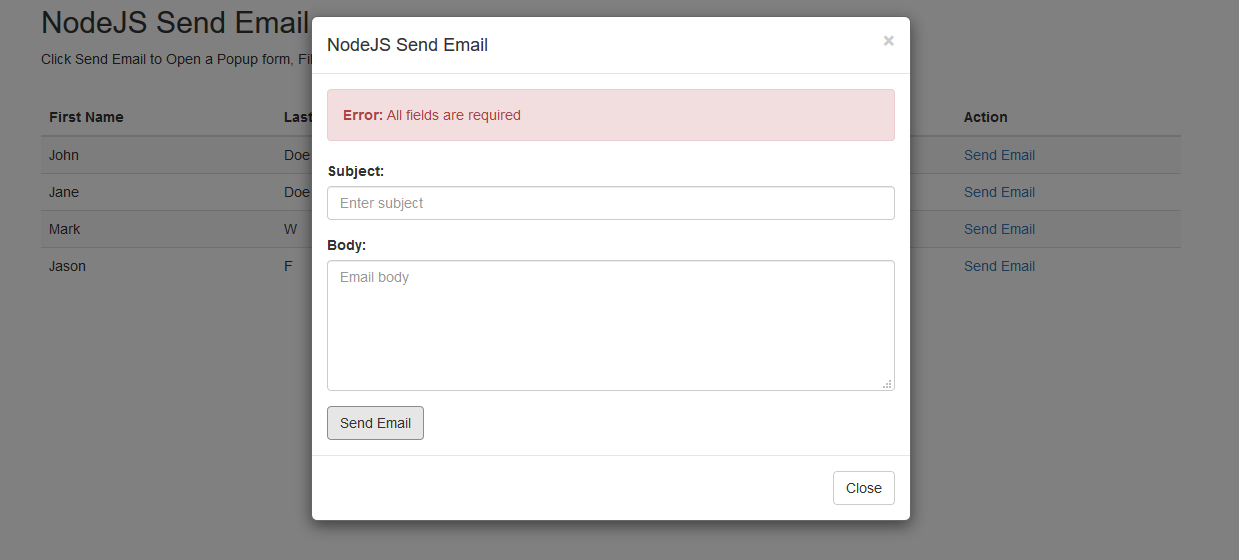
If a user presses Send Email button without entering values, an error message is displayed.
jQuery Ajax code to send data to server
Using jQuery Ajax, data is sent to the server, when user clicks Send Email link. Link’s js-sendemail class Click event is triggered. Before opening the popup form, subject and message field values are emptied and email value from data attribute of link named as data-email is fetched and assigned to email variable.
script.
    $( function() {

      $(".js-sendemail").on('click', function(){
           var email = $(this).attr('data-email');
           $("#email").val(email);
           $("#subject").val('');
           $("#body").val('');
           $('#msgdiv').html('');
      });
      $("#btnemail").on('click', function(){
           var email   = $("#email").val();
           var subject = $("#subject").val();
           var body    = $("#body").val();
           if(!subject || !body){
               $('#msgdiv').html("<strong>Error:</strong> All fields are required").show();
           }else{

            $.post( "send_email", {email:email, subject: subject, body:body  })

            .done(function( data ) {

                 console.log(data.code);
                if(data){
                  if(data['code'] == 2){
                    $('#msgdiv').removeClass('alert-success').addClass('alert-danger').html("<strong>Error:</strong> All fields are required").show().fadeOut(3000);
                  }else if(data['code'] == 3){
                    $('#msgdiv').removeClass('alert-success').addClass('alert-danger').html("<strong>Error:</strong>  Email not sent. Please try again.").show().fadeOut(3000);

                  }else if(data['code'] == 1){

                    $('#msgdiv').removeClass('alert-danger').addClass('alert-success').html("<strong>Success:</strong> Email sent successfully. <br /><br />Message URL: "+data['messageURL']).show();
                  }

                }else{

                  $('.error').show(3000).html("Email could not be sent. Please try again.").delay(2000).fadeOut(1000);
                }

             });
           }
      });


    });

After the user fills in the subject and message fields and presses Send Email button. click method of button btnemail is triggered and values of email, subject, and body are assigned to variables.
Using jQuery AJAX post request is sent to the server’s send_email route. If the user does not enter any of field values, an error message is displayed on the form.
Send an email using nodemailer
After the request received by the server, in send_email route subject, email and body are assigned to variables.
Email field is validated by performing a subscriber’s find method. You can see in find method a condition {email: email } is specified.
In an anonymous method error, and the subscriber information is returned. If subscriber exists in the database and email is sent using SMTP email service provider.
req.models.subscribers.find({ email: email }, function (err, subscriber) { ... }
If you do not have an SMTP server, the nodemailer provide a fake SMTP email service Ethereal. For sending an SMTP service email, you would need a host, username, port and password. So first a request is sent to Ethereal service to get a hostname and fake username and password.
nodemailer.createTestAccount((err, account) => { ... }
CreateTestAccount method returns an error and an account. Account variable contains the SMTP username and password. Inside CreateTestAccount method, createTransport method is called.
The host is smtp.ethreal.email, port is 587. In an auth object host, port, username and password are assigned. After SMTP credentials are assigned to transporter variable, email options are specified with From, To email, subject and email body.
Next transporter.sendMail method is called and emailOptions are passed. An error and info object are returned from this method. Info contains the messageId and URL from ethereal. MessageId and message URL is sent back to the client.
router.get('/', function(req, res, next) {

               .........


    }).post('/send_email', function(req, res, next) {
        var email     = req.body.email;

        var subject   = req.body.subject;

        var emailbody = req.body.body;

        if(!email || !subject || !emailbody){

            res.json({code: 2});

        }else{

            req.models.subscribers.find({ email: email }, function (err, subscriber) {

                if(err) throw err;

                if(subscriber.length){

                // Generate test SMTP service account from ethereal.email
                // Only needed if you don't have a real mail account for testing

                nodemailer.createTestAccount((err, account) => {

                    // create reusable transporter object using the default SMTP transport

                    let transporter = nodemailer.createTransport({

                        host: 'smtp.ethereal.email',

                        port: 587,

                        secure: false, // true for 465, false for other ports

                        auth: {
                            user: account.user, // generated ethereal user

                            pass: account.pass  // generated ethereal password
                        }

                    });

                    // setup email data with unicode symbols
                    let mailOptions = {

                        from: '"Info" <info@example.com>', // sender address

                        to: email, // list of receivers

                        subject: subject, // Subject line

                        text: emailbody, // plain text body

                        html: emailbody // html body

                    };

                    // send mail with defined transport object
                    transporter.sendMail(mailOptions, (error, info) => {

                        if (error) {

                            return console.log(error);
                        }

                        console.log('Message sent: %s', info.messageId);

                        // Preview only available when sending through an Ethereal account

                        console.log('Preview URL: %s', nodemailer.getTestMessageUrl(info));

                        res.json({code:1, messageId: info.messageId, messageURL: nodemailer.getTestMessageUrl(info)});

                    });

                });

                }else{

                 res.json({code: 3});
                }
            });
        }
    });

module.exports = router;

View email on Ethereal SMTP Server in nodejs send email
When you send an email using Ethereal, email is stored in Ethereal and is not sent to the recipients but it can be tested like a real SMTP server. Ethereal provides a link and messageId. So you can view the email using the provided URL as shown in the image below.

To run and view the nodejs send email app
To run nodejs send email application, open command line and type the command.
SET DEBUG=nodejs-send-email:* & npm start
To view the running application, open browser and type the URL below. You can see the running application.
http://localhost:3000
Summary
To summarize, in this nodejs send email tutorial, a MySQL database and table was created with sample data. A nodejs project was created with orm and nodemailer module. Records are displayed for all subscribers with a link to Send Email.
Clicking Send Email link a popup form is displayed with subject and body fields. After the user fills in the form and clicks on the Send Email button. Email is sent and the user sees a message Id and message URL.
You can download the source code of the tutorial from the GitHub repository.
Please follow us on twitter or like our Facebook page to stay updated with upcoming articles. Leave your comments and feedback below.
Related Articles
- NodeJs MongoDB Restful API
- Generate CSV using nodejs
- Using Socket.IO with NodeJs and MongoDB
- Nodejs passport login script
- Nodejs MongoDB tutorial
Previous Article:
Dynamic PHP photo gallery
Next Article: